.png)
Led Cube 3x3x3 Tutorial
Want to make Led Cube 3x3x3? Here is TUTORIAL how to make it!

Led Cube 3x3x3 Tutorial
Hello, it`s my first tutorial on my blog, so i hope it would be useful for somebody.
In this tutorial I’ll show how you can create your own pocket size LED Cube 3x3x3. I’m sure you already saw some similar projects to this one but you never took action and made your own. Now it’s time to make your own, because it`s very easy and you don`t need professional skills to do it by your own.
Parts Required:
- 27x LED’s
- 1x Stripboard
- 3x 22k ohm Resistors
- 9x 220 ohm Resistors
- 3x NPN Transistors (for example: 2N2222, BC547, 2N3904)
- Wire
- Few Pin Headers
- Carton paper

 Tools Required:
- Solder
- Soldering iron
- Tweezers
- Pliers
- californium
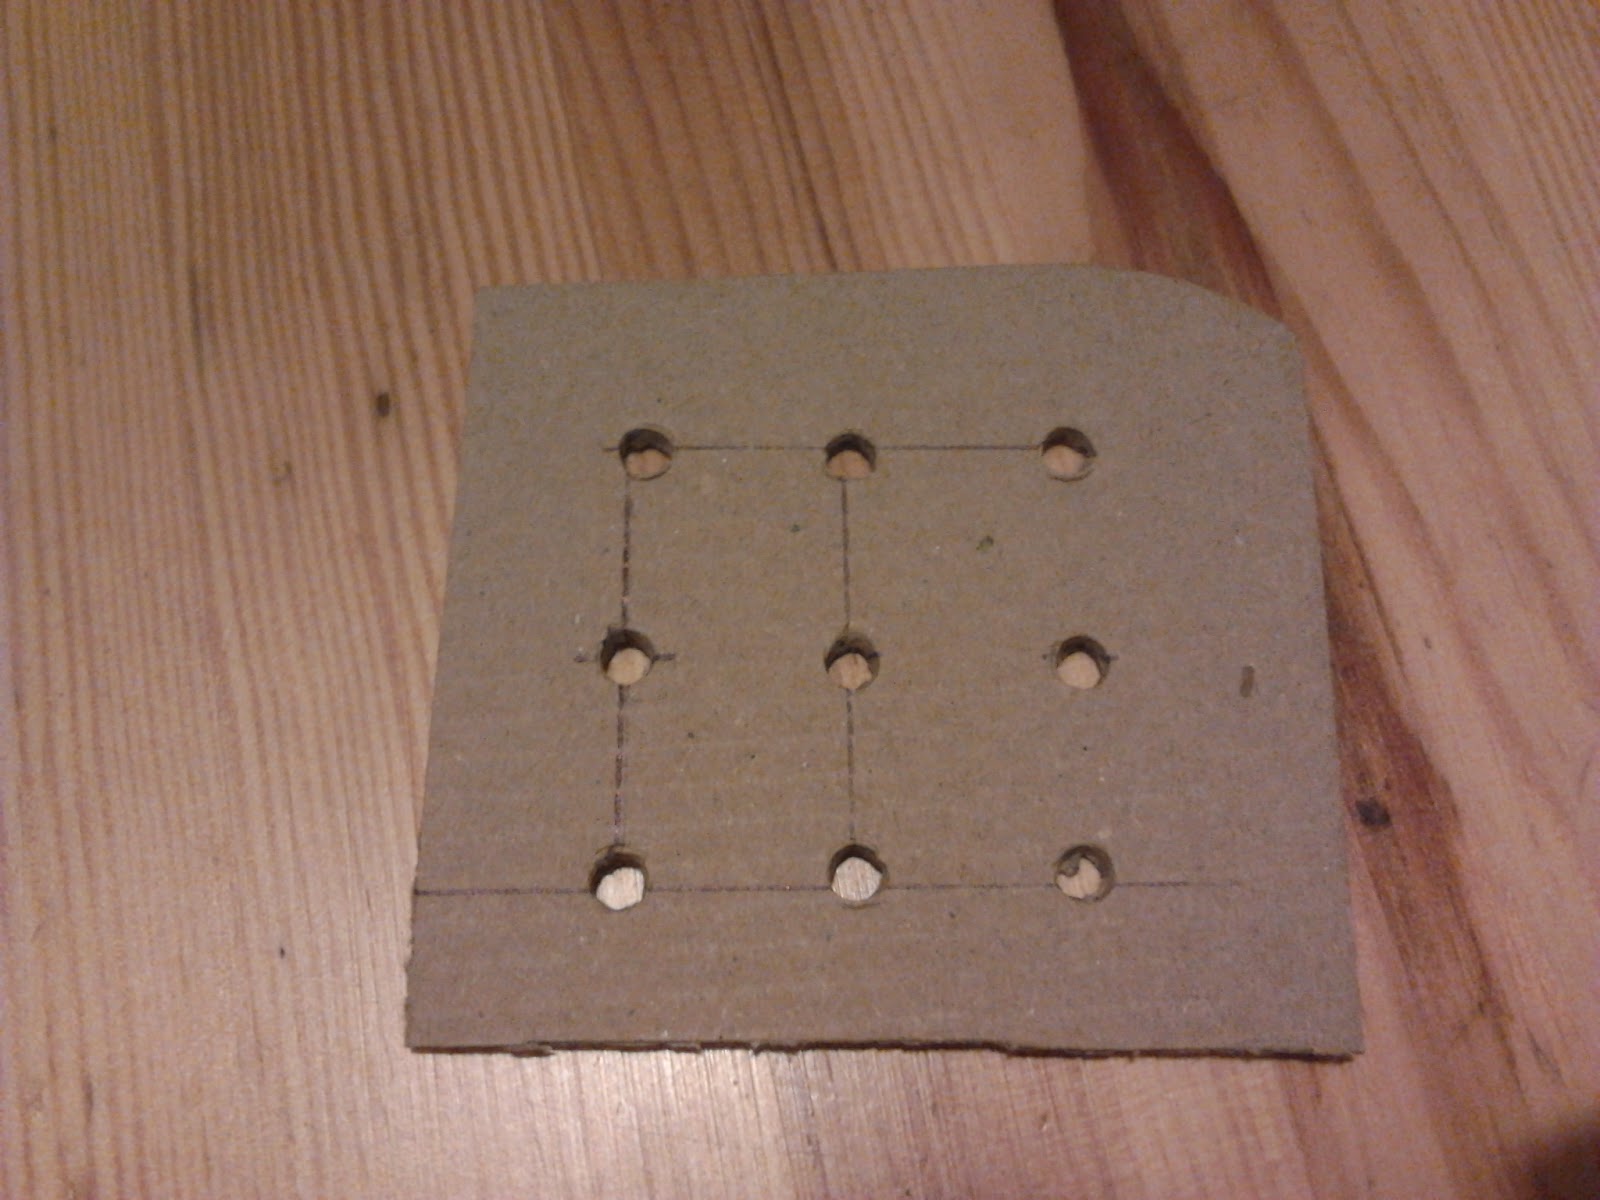 First take your cardboard and drill 9 holes or just make them using awl. Before you drill your holes in the carton, make sure that diode's lead will be enough long to connect it to the next led's lead. Then put in your LED`s and turn down all the negative leads and solder them together. Longer LED lead is positive and tthe short one is negative! It should look like this:
Longer LED lead is positive and the short one s negative


Bend down all negative leads and solder them together

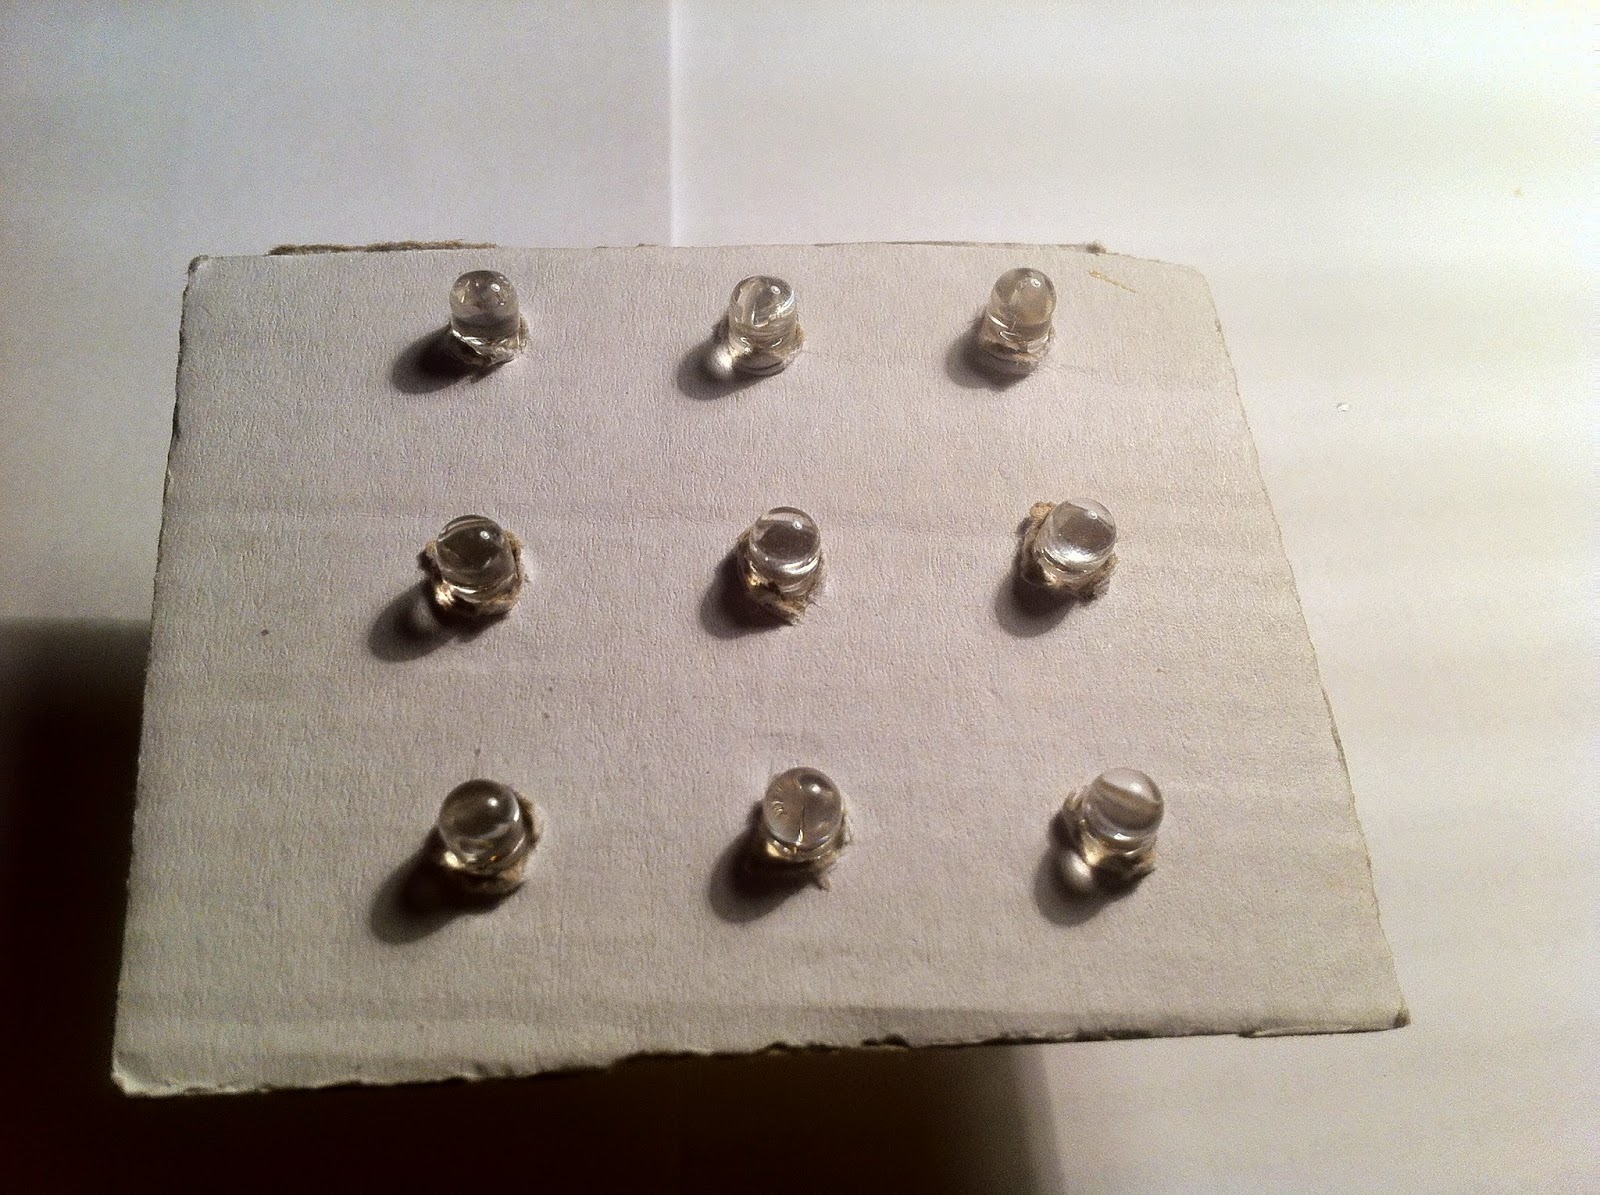
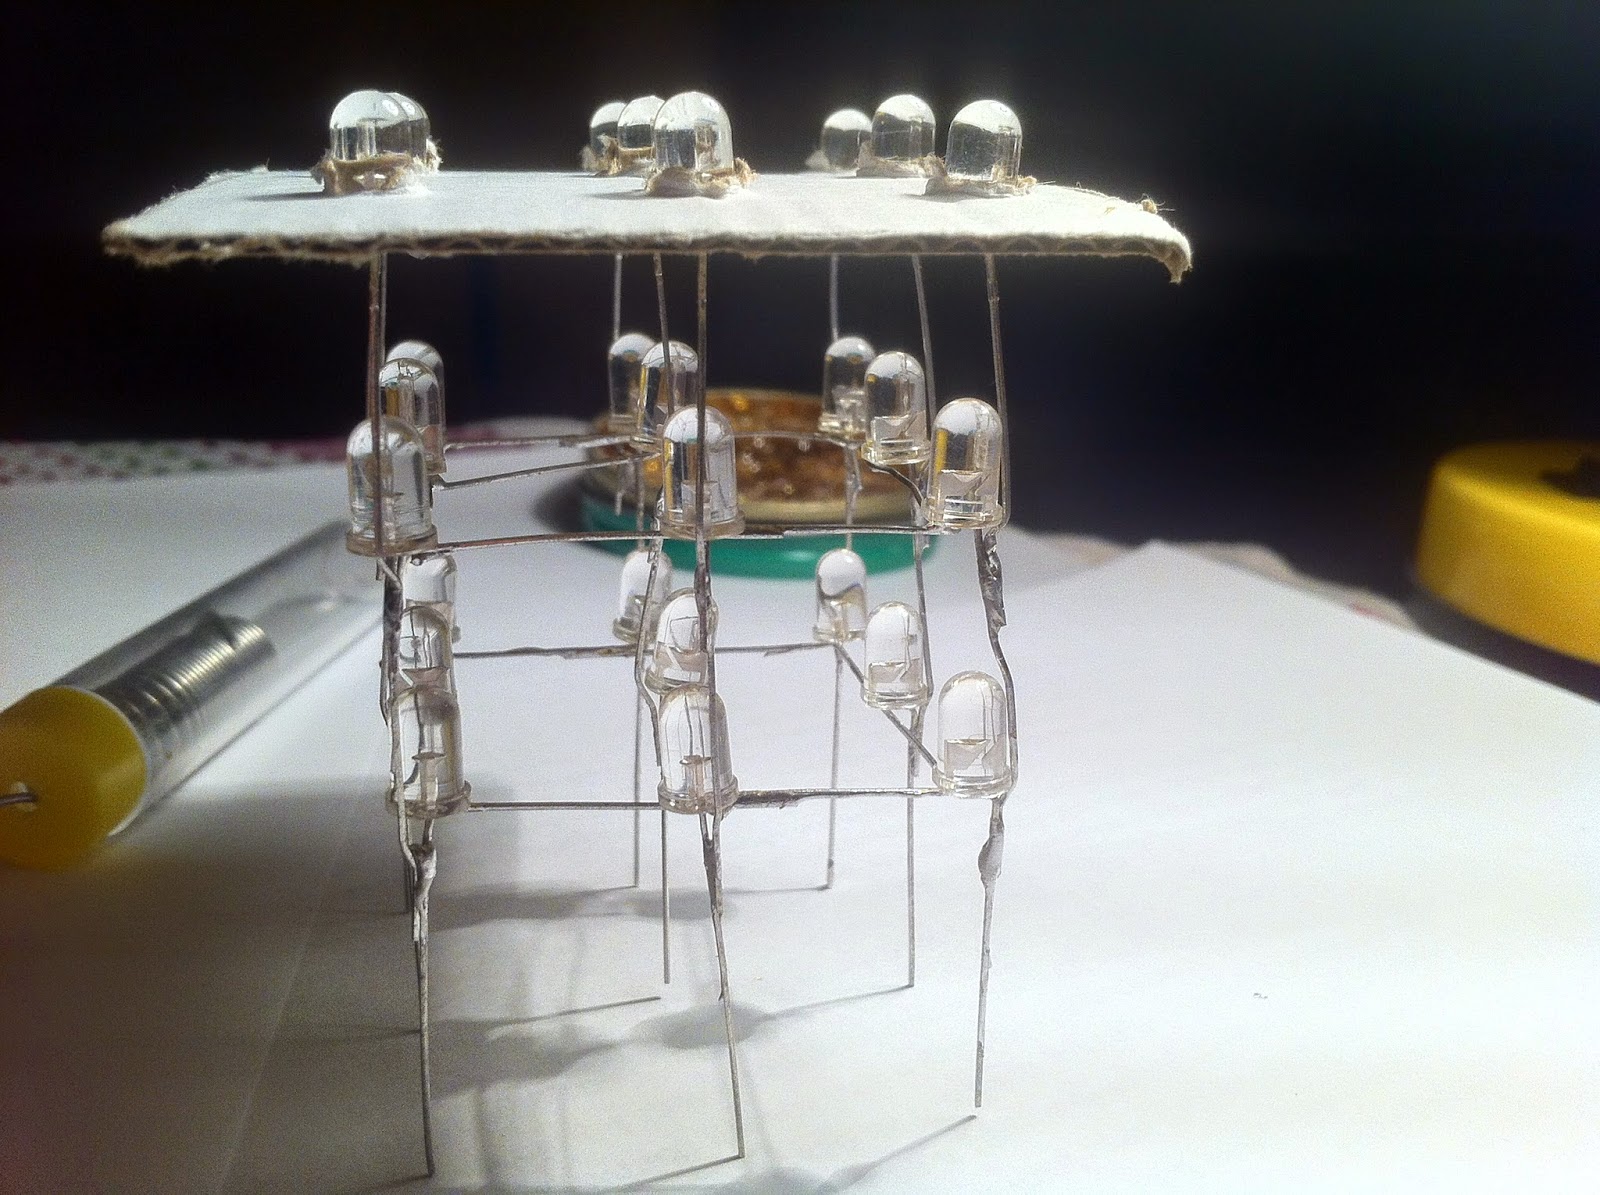
After soldering them together, take your first led layer out of carton and make two more. Next step is to solder all led layers together, i recommend to use alligator clip which will help to keep everything together. Solder layers together with positive led`s leads, and after that your work should look something like this:


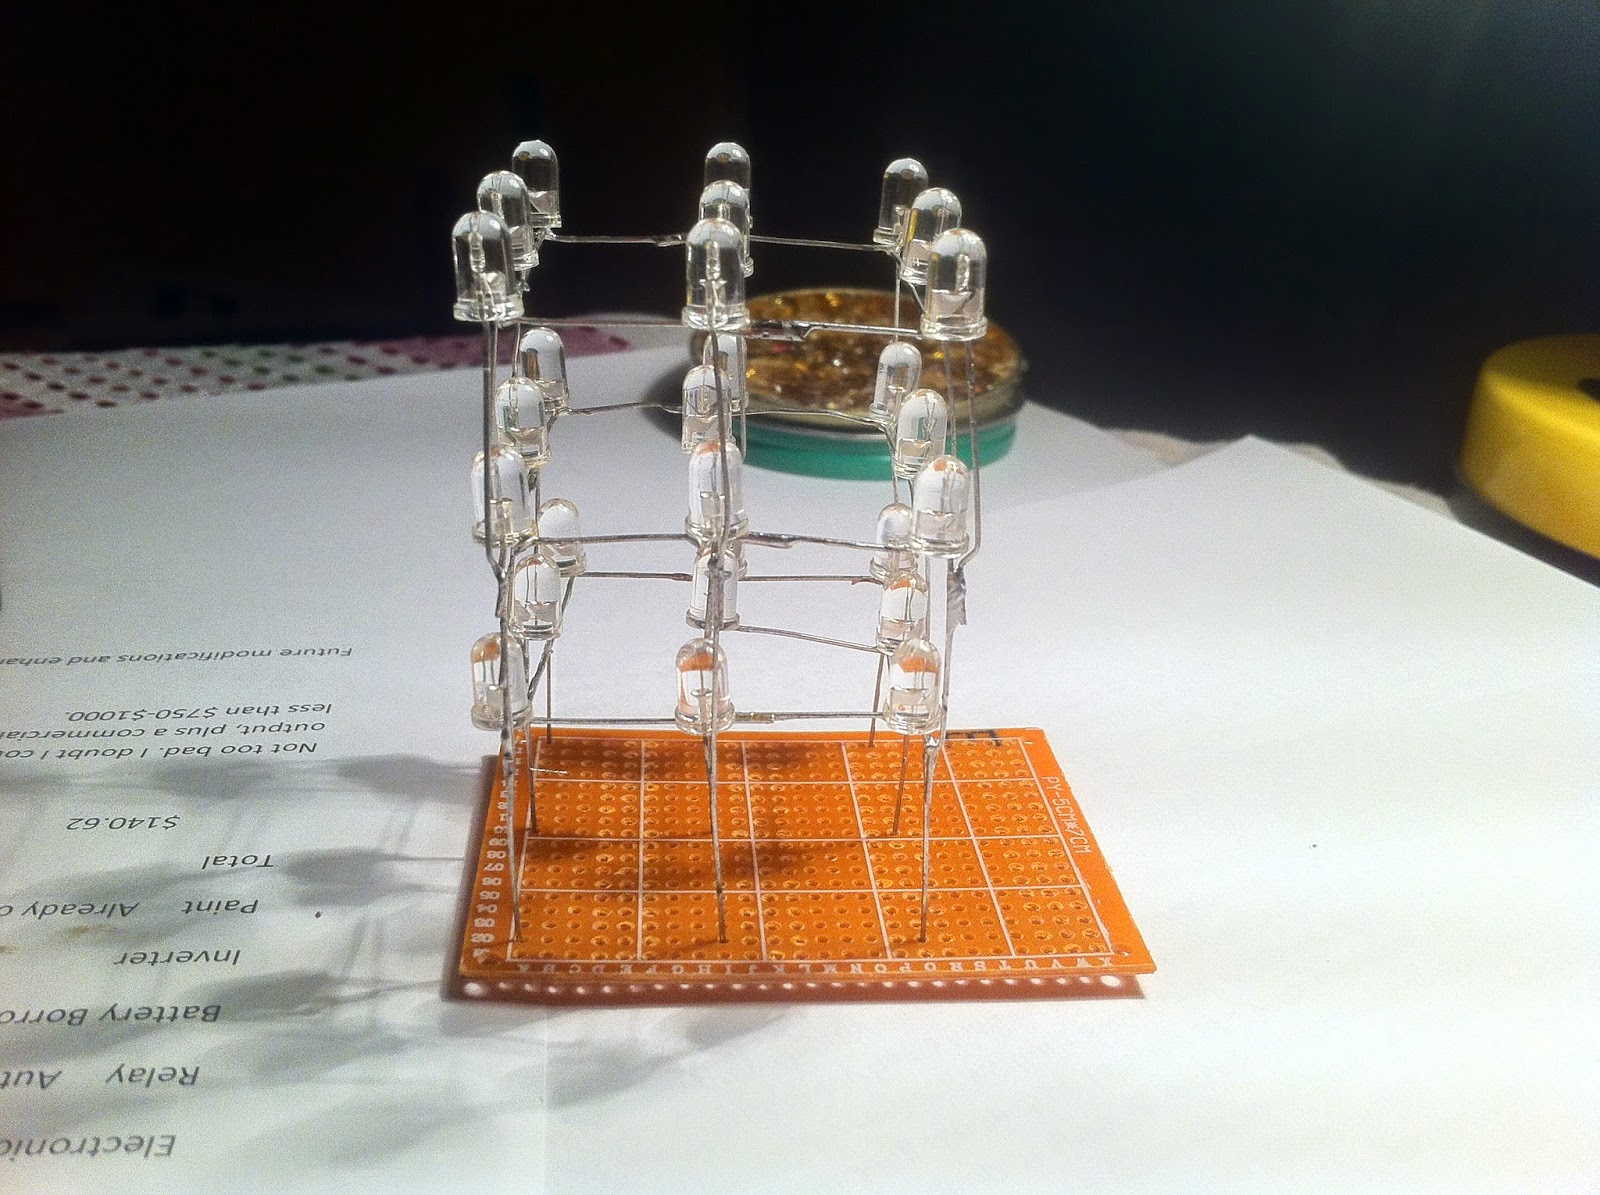
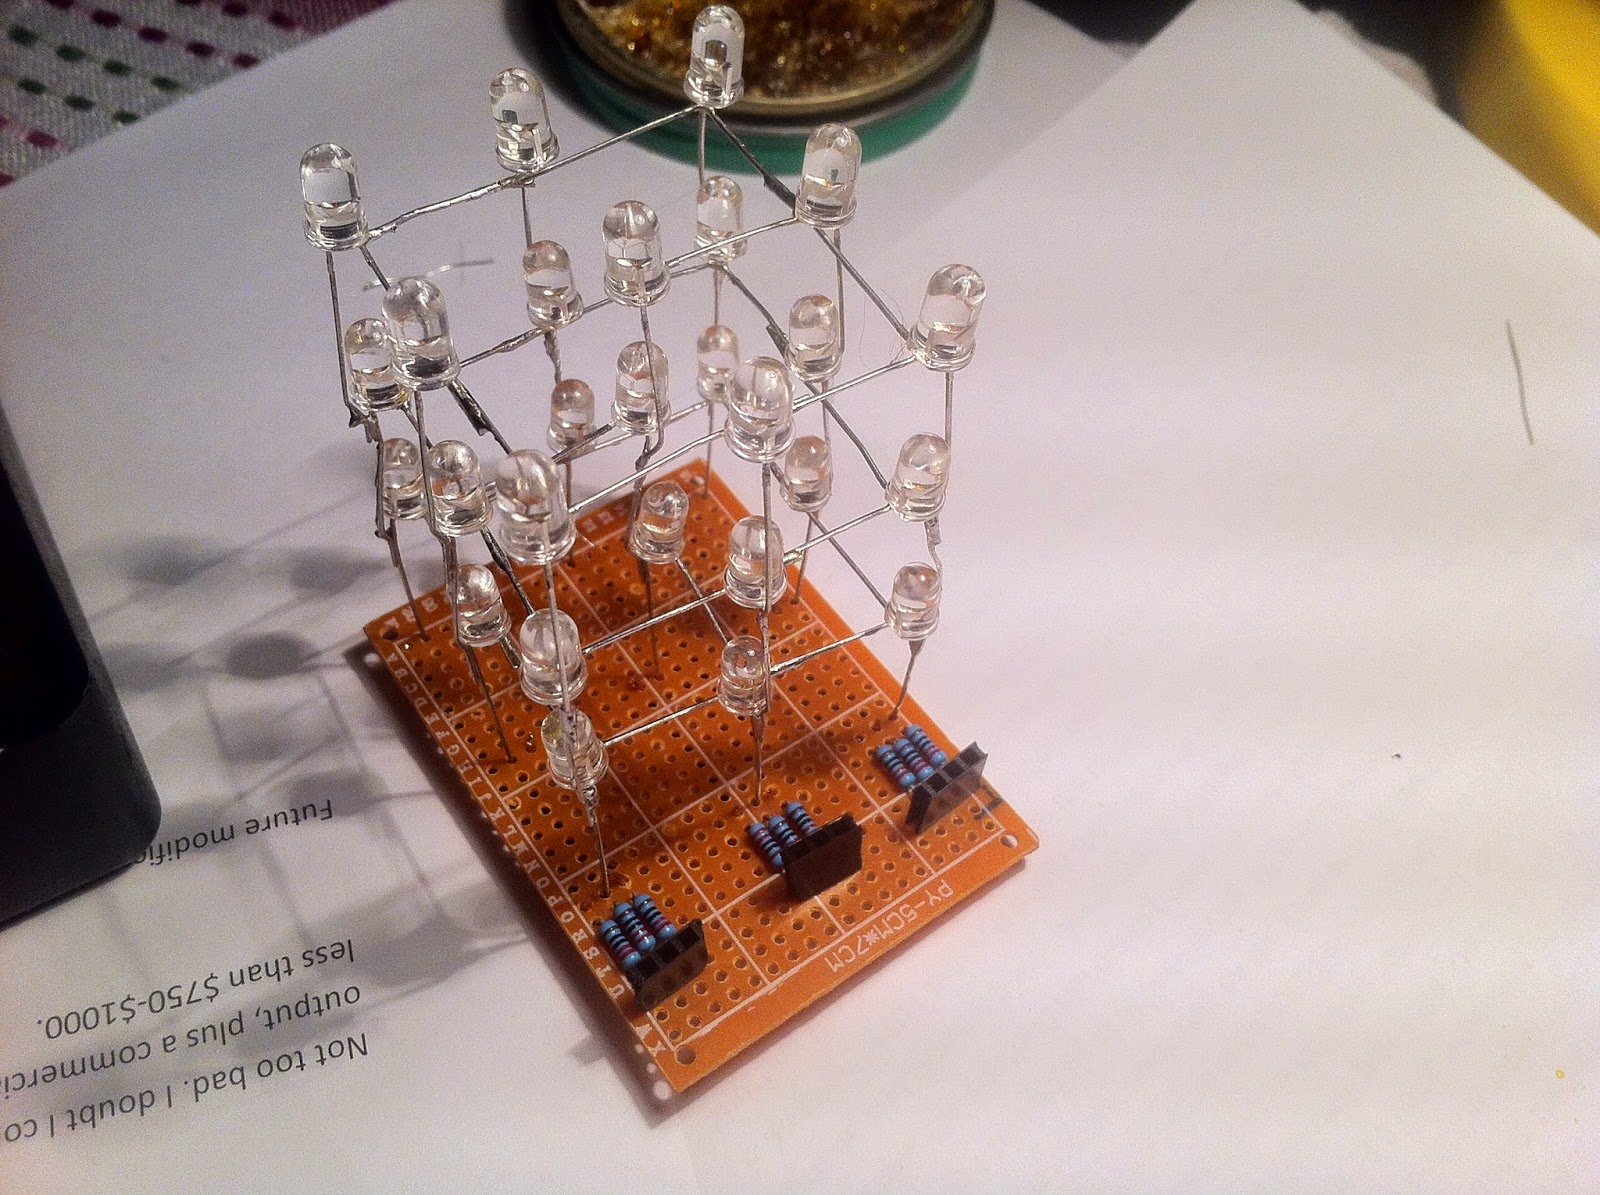
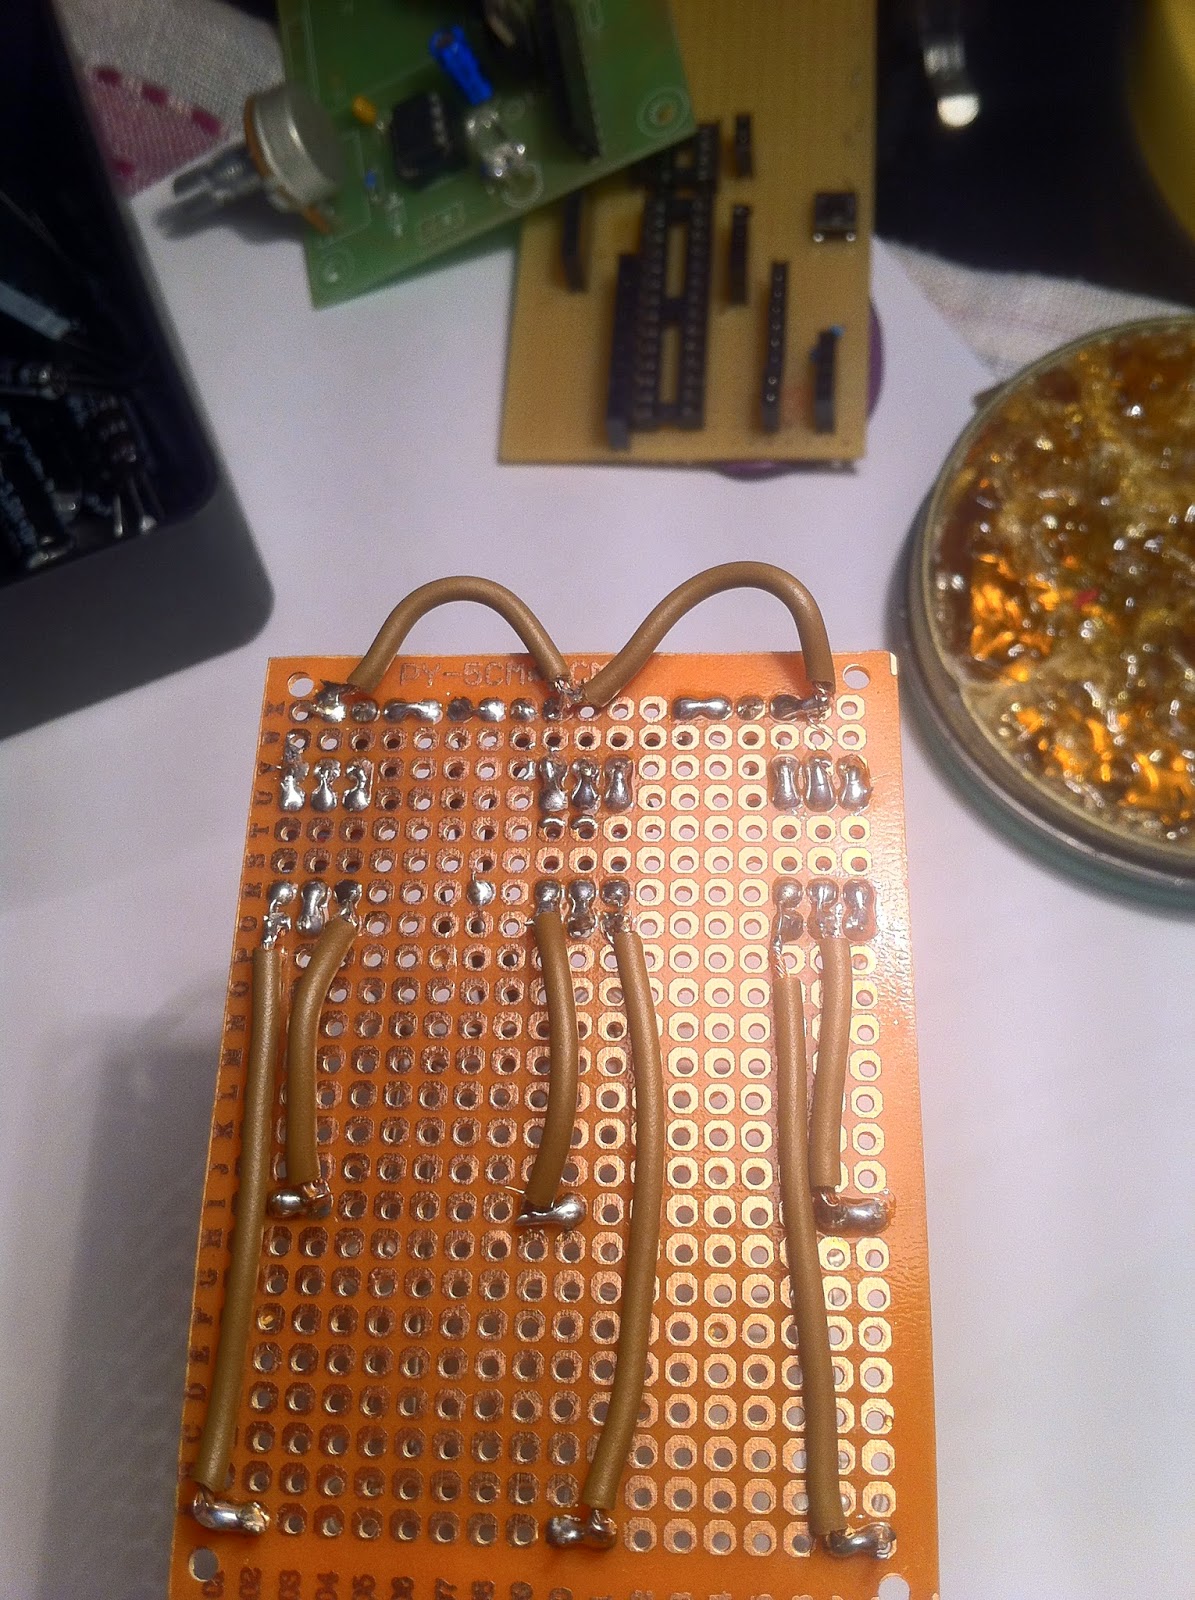
Next step is to solder the LED cube on to stripboard. If you are using small stripboard just like me then try to attach LED cube as much as possible to one side of stripboard, so there would be more space for other components. I was counting holes, where to put in led`s positive leads, so the LED cube will look better.

After soldering your led cube to stripboard, you need 6 pieces of wires and solder them to positive leads on the other side of stripboard, just like this:


I did not solder any wire to first 3 led leads from right side, because i will make connection without any wires there. Now you need to solder 9 220ohm resistors next to the wires, and it should look something like in those pictures:


I recommend to turn down all resistor leads so them will hold in right place. I prefer to put everything in place and only then solder all together. It could be a bit tricky because i wanted to make it as compact as i can.


Use pliers to turn down resistor leads and connect them with wire connections. After soldering all together just cut of the needless resistor leads with pliers. NOTE: Do not throw away resistor leads you just cut, they will be very useful later, and in other projects you make, because they are good as a wire in tricky places.

Next step is to solder pin headers in place ( connections to connect your led cube with AVR programmer later). First solder only one pin header lead to hold them in place.

Now it`s time to solder NPN transistors in place. Pay attention to from which side you are looking at NPN transistor, because one side is rounded. Here is schematics how wires goes. I bended the NPN transistor lead and put it out on the other side of stripboard, i will solder the led cube layer wires to those leads.
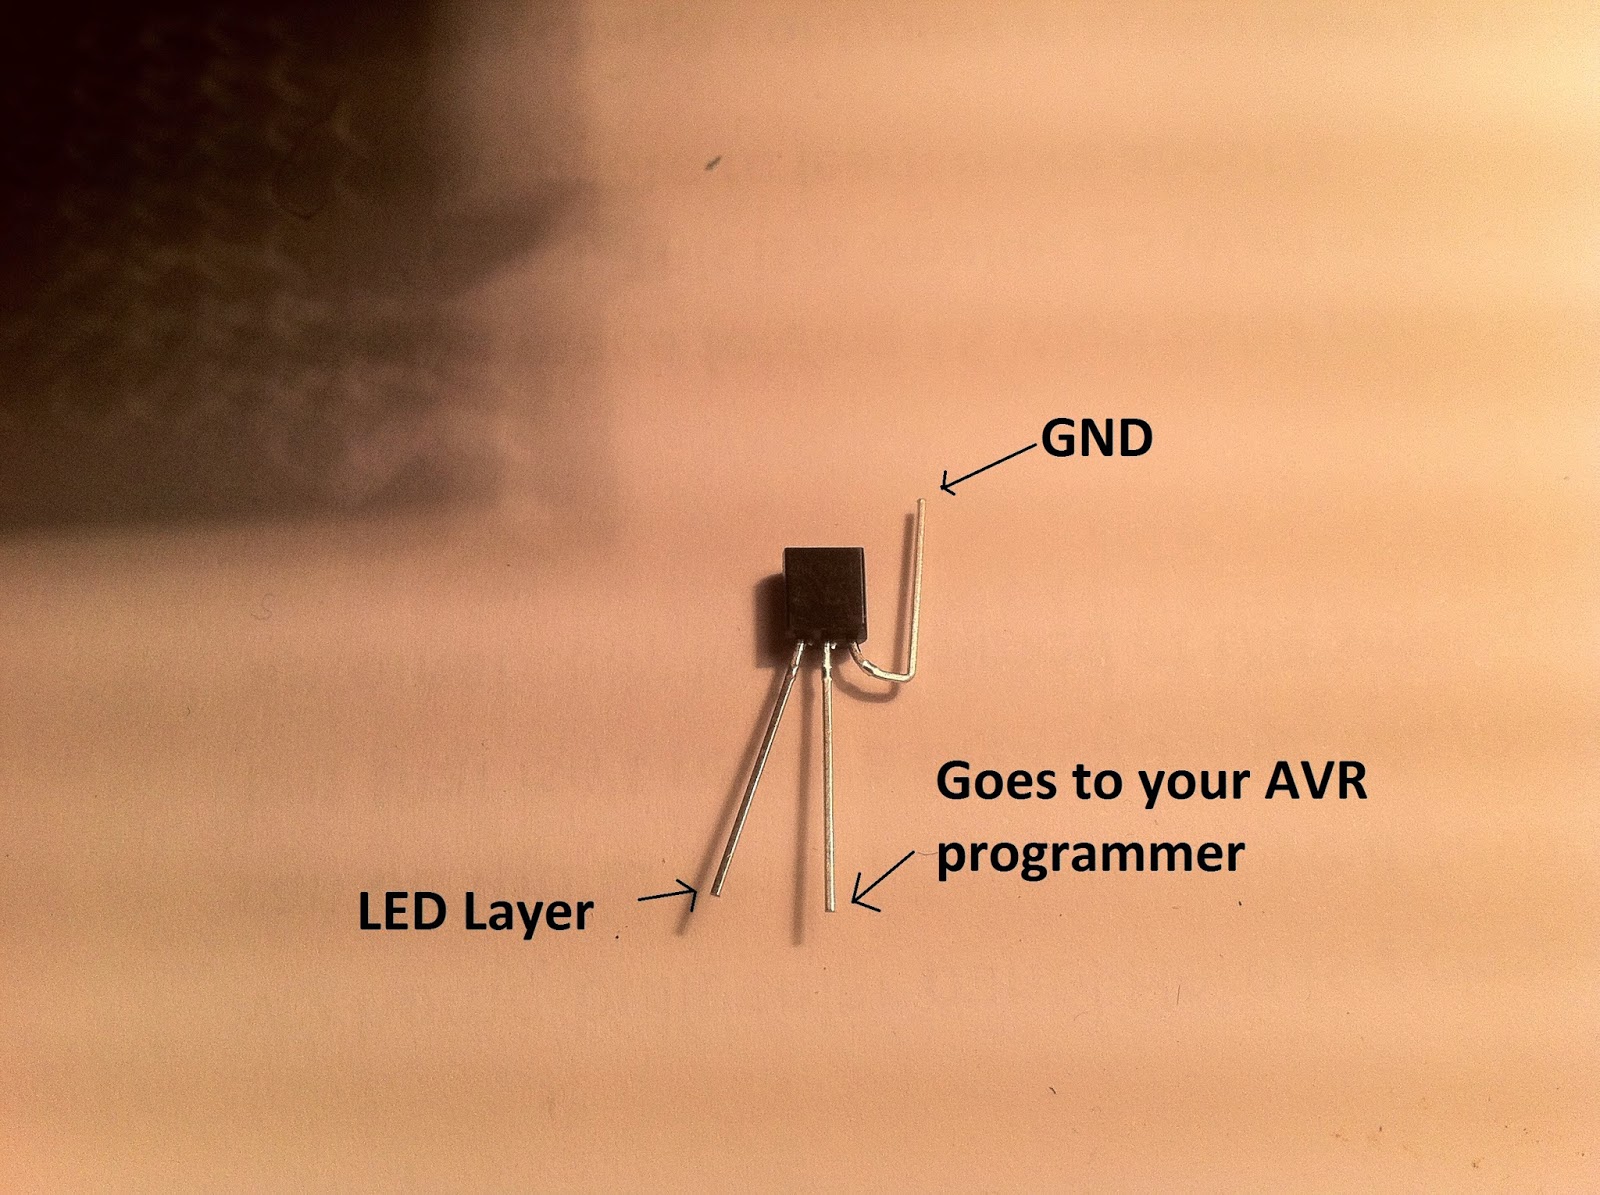

I turn down NPN transistor leads to hold everything in place and then solder them to stripboard. And then again cut of needless leads with pliers.
Sorry for bad image, but i hope you can see how NPN transistor lead is bended.

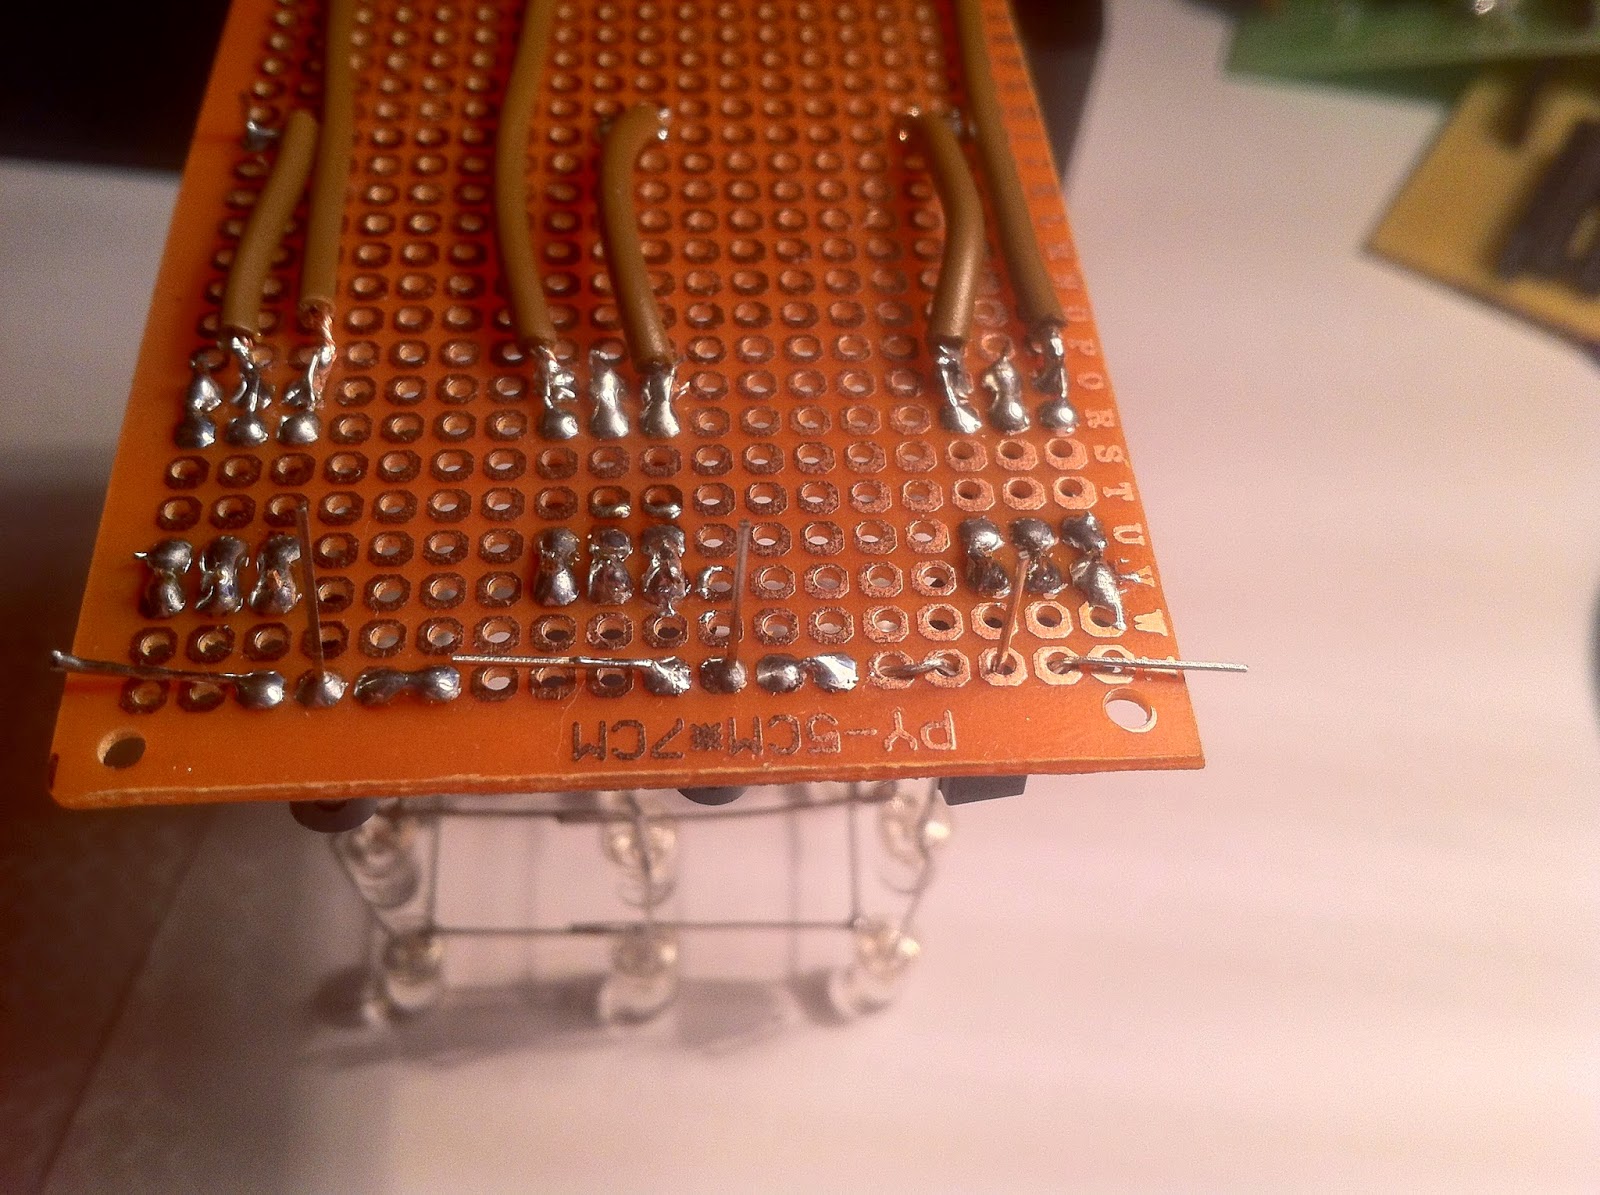
This is how it`s look after soldering everything in places. Please notice that NPN transistor lead is coming through stripboard from it`s bottom side, it`s where i will solder led cube`s layer wires.

Now solder wires to NPN transistor leads and to negative leads on each led cube layer, just like this:
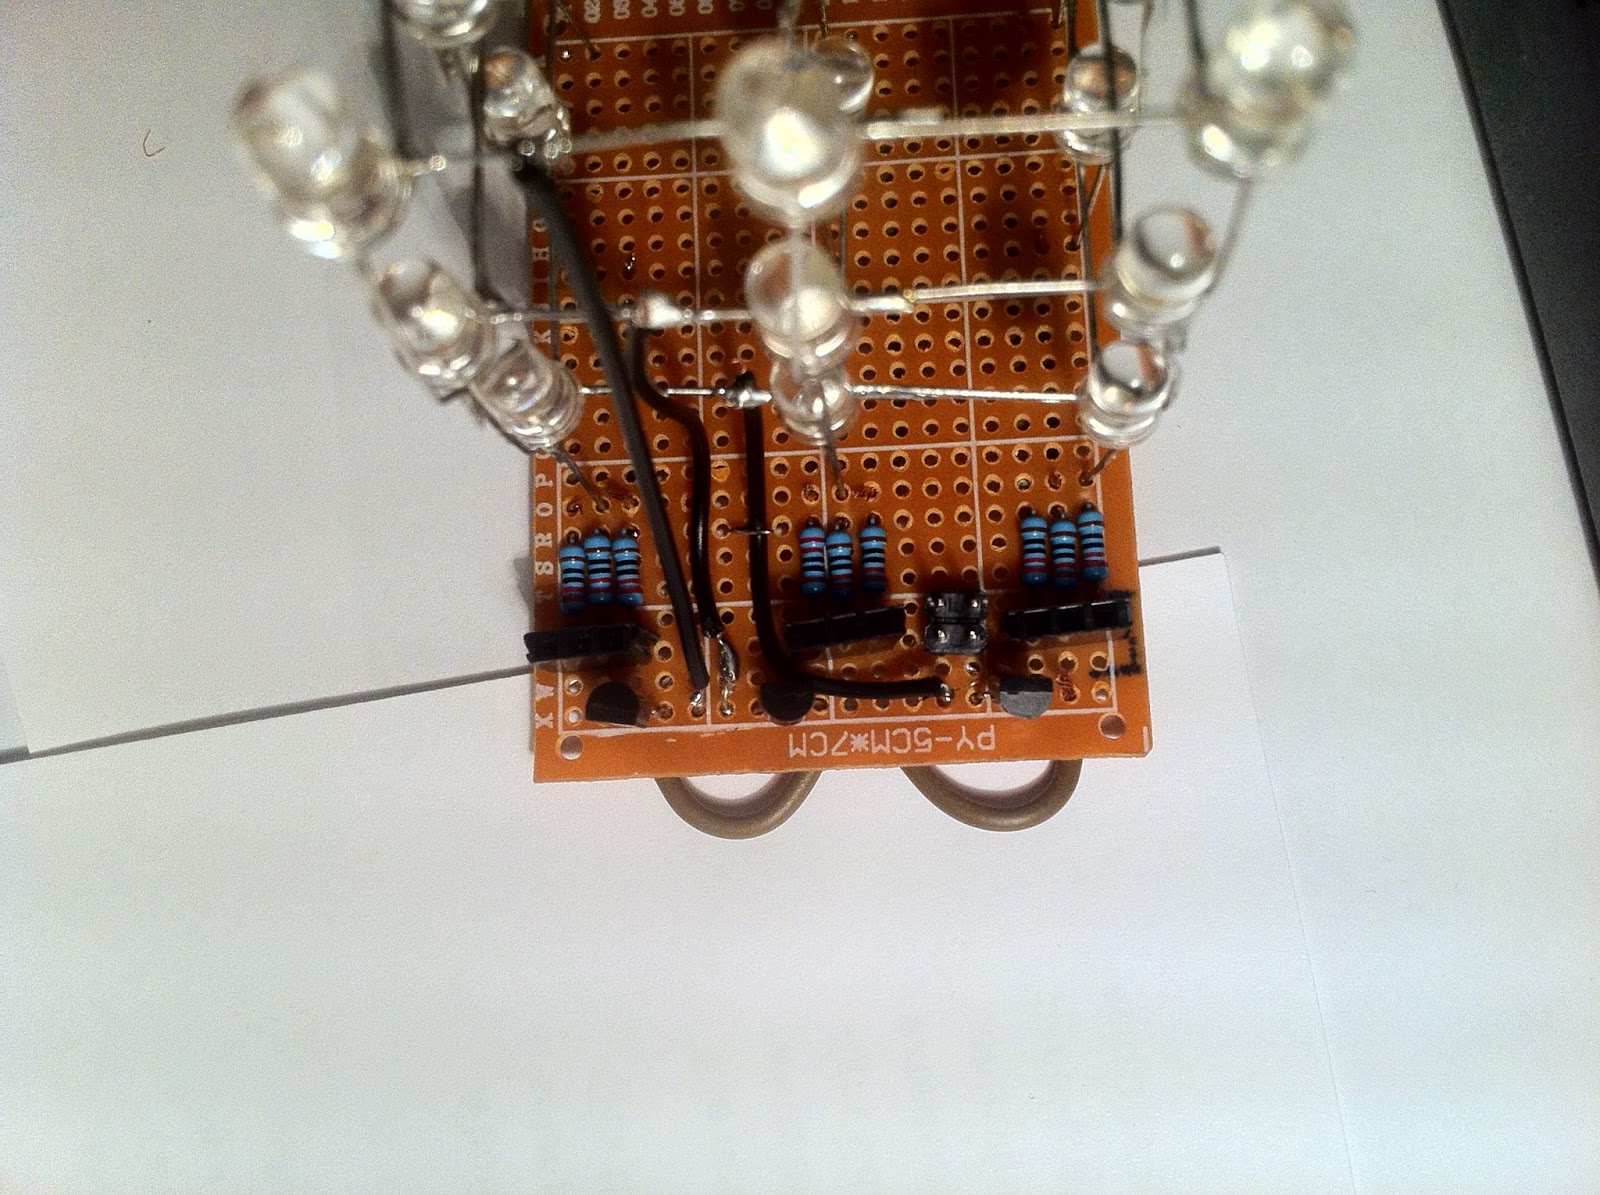
I bended one of the leads i cut of before, i will use it to hold wire nice in place, so everything will look better.

This is how i putted the wire nice in place.

Now i soldered another pin header in place, where i can connect GND and each layer. And GND wire through all NPN transistor must be soldered too. Now it`s where you can use cuted leads as a wire, to connect NPN transistor with pin header.

GND wire goes through all NPN transistors to pin header. And also each NPN transistor middle lead goes to pin header. It`s a bit tricky to get all wires in right places because of the small sizes, but pliers would help, be patiente.

About the photo above:
Each wire is connected to only one pin header lead.
And in left upper corner in picture there is wire from NPN transistor hanging in the air, it also must be soldered to pin header.


The Final Product!
It`s how it should look at the end! My first video ever:
Hope you understand all of my tutorial if not you can ask questions in comments or send email to solderboard@gmail.com
Right now it`s all, i will make instructables how to connect your Led Cube to your own AVR programmer or arduino how to program it, and also full working led cube program code.


This comment has been removed by a blog administrator.
ReplyDeleteGreat Tutorial, helped me to make my own Led Cube. A lot of pictures, and i hope Videos to will be in future.
ReplyDeleteYou got a really useful blog I have been here reading for about half an hour. I am a newbie and your post is valuable for me.
ReplyDeletehealth and safety display
Such an amazing blog about the state government and I really appreciate you work which you have done well.
ReplyDeletestate government
Nice blog and your all presenting information are very great and it's really good well done.
ReplyDeletehttps://youtu.be/jgC5Ps9EBnQ
Nice work and all information about the press release writing service that's are very amazing well done.
ReplyDeletepress release writing service
Finding your freelance modeling job is easy if you: have an excellent attitude, arrive early to every audition, respect your coworkers and make as much contacts as you can within the industry. Celina Landari
ReplyDeletehttps://bayanlarsitesi.com/
ReplyDeleteEskişehir
Erzincan
Ardahan
Erzurum
G1V6C
izmir
ReplyDeleteErzurum
Diyarbakır
Tekirdağ
Ankara
72ZRPG
ankara parça eşya taşıma
ReplyDeletetakipçi satın al
antalya rent a car
antalya rent a car
ankara parça eşya taşıma
7HTE3
Antep Lojistik
ReplyDeleteYalova Lojistik
Erzincan Lojistik
Tekirdağ Lojistik
Elazığ Lojistik
RGKKK
91D17
ReplyDeleteBurdur Parça Eşya Taşıma
Muş Evden Eve Nakliyat
Adana Evden Eve Nakliyat
Kayseri Lojistik
Hatay Evden Eve Nakliyat
AAA98
ReplyDeleteYalova Şehirler Arası Nakliyat
Elazığ Şehir İçi Nakliyat
Artvin Şehirler Arası Nakliyat
Yalova Evden Eve Nakliyat
Baby Doge Coin Hangi Borsada
Urfa Şehir İçi Nakliyat
Bayburt Şehirler Arası Nakliyat
İstanbul Şehirler Arası Nakliyat
Silivri Parke Ustası
5DCA0
ReplyDeleteCoin Üretme Siteleri
resimli
Kripto Para Çıkarma Siteleri
Bitcoin Madenciliği Nedir
Binance Madenciliği Nedir
Kripto Para Kazanma
Coin Nedir
Gate io Borsası Güvenilir mi
Kripto Para Kazma
99E99
ReplyDeleteShibanomi Coin Hangi Borsada
Kripto Para Madenciliği Nasıl Yapılır
Tumblr Beğeni Satın Al
Baby Doge Coin Hangi Borsada
Sui Coin Hangi Borsada
Bitcoin Nasıl Alınır
Bitcoin Nasıl Alınır
Görüntülü Sohbet Parasız
Binance Madencilik Nasıl Yapılır
YYTHJYUHJMKUY
ReplyDeleteشركة تسليك مجاري بالقطيف
شركة تنظيف بخميس مشيط Oqk2uClsUE
ReplyDeleteشركة مكافحة حشرات Y9Z1jUOEY7
ReplyDeleteشركة صيانة افران o5bjOQsqQ2
ReplyDeleteشركة عزل اسطح بالجبيل M9ojTewnET
ReplyDeleteشركة تنظيف مجالس بالاحساء yfJPBqN2EX
ReplyDelete4B96A35D7A
ReplyDelete47 Ronin Hikayesi
Kaspersky Etkinleştirme Kodu
Zula Hediye Kodu
Total Football Hediye Kodu
Whiteout Survival Hediye Kodu
Hay Day Elmas Kodu
M3u Listesi
Galatasaray Renk Kodları
Tokyo Ghoul Konusu
E26CD7D6A9
ReplyDeletebot basma tiktok
A312C565EA
ReplyDeleteorganik takipçi
düşmeyen takipçi
ucuz takipçi
Dude Theft Wars Para Kodu
Manitayla Oynanacak Oyunlar
Rize Yaylaları
Dark Academia Nedir
Zula Hediye Kodu
Tinder Promosyon Kodu
شركة تسليك مجاري بحفر الباطن 807juqB1h4
ReplyDeleteشركة صيانة افران بجدة dVK3QxoqlA
ReplyDeleteA78F439A8B
ReplyDeleteuygun instagram takipçi
tiktok beğeni satın al
mobil ödeme takipçi
güvenilir takipçi
tiktok takipçi